


ONETEAMTECH, on the move……7, Adebayo Close behind Forte Oil, Surulere..tel: 08188910438, 08128982579……….e: thinklabtechnologies8@gmail.com
blog
Sunday 12th May 2018
.
Saturday 12th May 2018
Sketchup Tips for smart 3d modeling Shortcuts Learning to use shortcuts is essential for fast modeling. I hardly ever use the standard toolbars and menus, just those related to plugins that can’t be mapped to a shortcut conveniently. On my SketchUP workspace you will find just the Layers, Shadows and Face style standard toolbars most of the time. With everything mapped to shortcuts you can free up some screen real-estate for the actual model and some other plug-in toolbars. It would have been really nice if Google could add support for saving the toolbars area scheme, or even just fix the jumping syndrome they tend to have when moving them around. You can export / import shortcuts through the preferences dialog when moving from one computer to the next and you can re-map them all as you see fit – even assign more then one shortcut per command (for example a left and right keyboard combination) I recommend mapping these commands window / hide dialogs edit / delete guides view / component edit / hide rest of model view / component edit / hide similar components view / rendering / edge / by axis view / face style / monochrome view / face style / x-ray Guides (Tape Measure & Protractor tools) Guides are a blessing, use them all the time. Add parallel ones using the Tape Measure tool and angular ones using the Protractor tool. I use them to layout grids, check measurements, to assist with snapping and a lot more. When you find that you have too many of them just clear them all out with one shortcut combination. 3d Modeling control Quintet If you followed my advice in the Shortcuts section above, you have created five on/off toggles I call Color by Axis, Monochrome, X-Ray, Hide Rest & Hide Similar. These will allow you to quickly check the model while working and keeping it all under control. Color by Axis This command will uncover all un-parallel linkwork issues and will allow you to fix them with a visual feedback. I use this command all the time when I insert a CAD drawing into SketchUP just to make sure all is well with the lines. Later on while modeling if you ever stumble upon stubborn non closing faces – turn this option on, it is most likely due to non parallel lines that were introduced to the model. Monochrome mode This face style uncovers all flipped normal issues, specifically after textures have been applied to the model. Some SketchUP commands like PushPull and FollowMe tend to create flipped faces that you sometimes can’t see if the model is textured (Many plugins have this issue too). X-Ray mode This face style will allow seeing through the geometry and model in a way impossible without it. Instead of rotating or hiding elements just to snap to something you can switch to X-Ray mode even during a command and quickly edit in place while saving a lot of time and allow for model checkup too. Hide Rest & Hide Similar This commands are convenience toggles. While X-Ray lets you see through the geometry, these commands actually hide elements away so that you can focus on the one in hand. It is very helpful modeling with a clear workspace and you can always toggle in the rest of the element for quick checkups and for re-orienting. Geometry separation using – Group / Layer / Scene SketchUP’s layering system, as opposed to the common in other application, provides visual separation only! Not geometry separation. What this means is that while you hide a layer, all its content can still be interacting with the visual model, snapping to it when intersected causing all kinds of problems. My rule is that nothing goes into a layer before I grouped it first. This makes sure I get geometrical separation and all the geometry inside the groups remains on default layer 0. So by grouping and assigning to layers you can have two levels of information separation which can be enhanced by using the page or scene system for more then just saving viewpoints. A scene can be set to just save the layer status, and so you can hide and show different sets of layers for each scene effectively introducing a third separation level, something like parent layers. The ideal would be if Google add a tree like layers hierarchy like the Outliner works – but till then the Group / Layer / Scene system work just fine.
Why is Product Rendering Better Than Photo shoot?


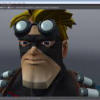
my all time dribbler…jay papa..the best

the most touching video of the day…a must watch


